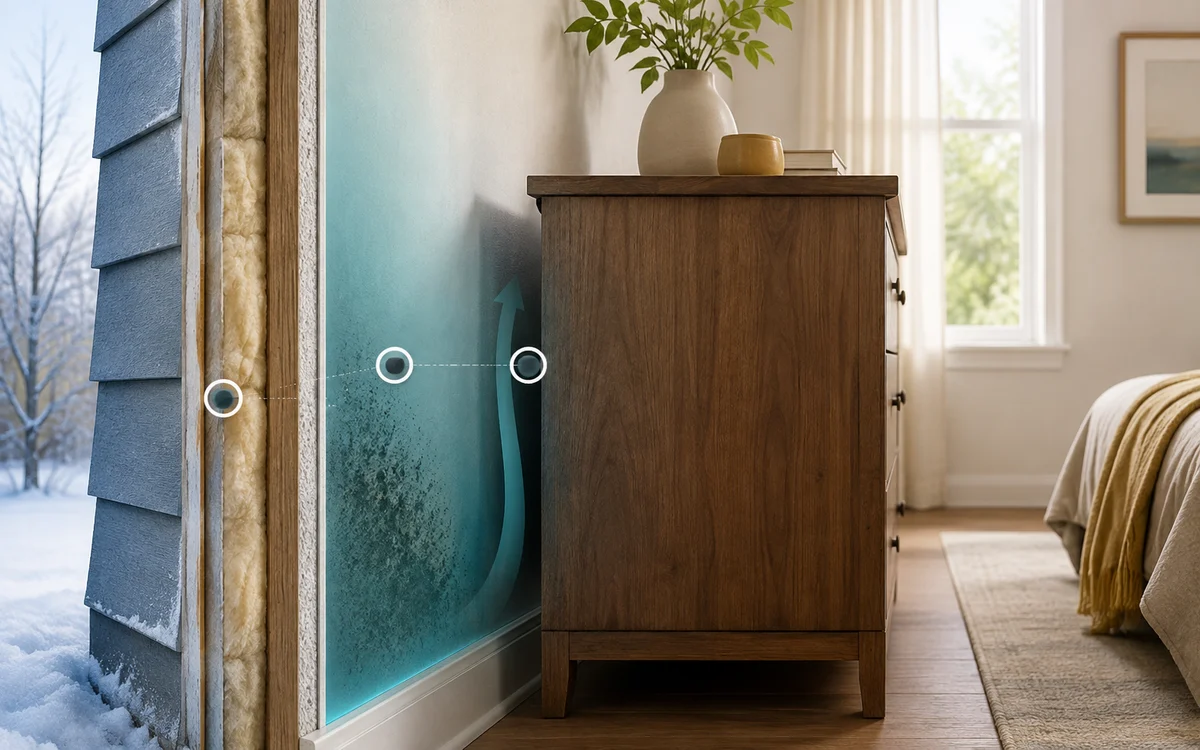
Mold behind furniture on an exterior wall often develops where a cold surface and weak air circulation create a high-humidity pocket, but rain entry, plumbing, and hidden wall moisture can look similar. Photograph the pattern, compare the wall with an interior control surface, and log room humidity, surface temperature, rain, and HVAC operation for 48 hours before choosing a repair.
What matters most
- A furniture-shaped patch that worsens in cold weather points toward a cold-surface and airflow problem, not proof of a leak.
- Peeling paint, softness, or staining that follows rain or plumbing use needs a bulk-water investigation.
- Clean only after the moisture source is corrected and the material is dry.
Match what is wet to when it changes
Move the furniture only far enough to inspect safely, photograph the undisturbed pattern, and use the same marked points for every reading. The table is a screening path, not a substitute for opening or testing a wall when evidence points inside the assembly.
| Pattern and timing | More consistent with | Evidence to collect next |
|---|---|---|
| Fine spotting follows the furniture outline and is worst in cold weather | A cold exterior surface plus a still-air pocket behind the furniture. | Compare the coldest wall point with an interior wall and calculate the room-air dew point. |
| Brown stain, blistered paint, or softness grows after wind-driven rain | Rain entry through roofing, flashing, cladding, a window, or another exterior detail. | Photograph the first wet edge during or just after rain and have the exterior water path inspected. |
| A narrow patch appears near a pipe, radiator, bathroom, or appliance | A supply, drain, or condensation leak in or beside the wall. | Stop the related fixture if safe, note whether the patch changes, and arrange a plumbing or mechanical inspection. |
| A corner or wall-ceiling line stays colder than nearby wall areas | An insulation void, thermal bridge, or air leak chilling the interior finish. | Map surface temperature at the patch, adjacent wall, and interior control wall at the same time. |
| The furniture back is affected but the wall remains dry | Moisture in the item, crowded contents, or poor drying around the furniture. | Inspect upholstery, backing, floor contact, and nearby RH before assuming the wall is the source. |
Document the undisturbed pattern first
Do not begin by scrubbing or painting. Photograph the wall, the back of the furniture, the baseboard, and the floor; include a ruler or another scale and estimate the total affected area. Record whether the growth is concentrated at the bottom, an outside corner, a wall-ceiling joint, or the exact shadow of the furniture.
If the item is heavy, anchored for tip protection, or likely to spread debris when moved, stop and get help. Do not disturb a wall that is soft, actively wet, extensively affected, or associated with sewage or another contaminated-water source.
Run a 48-hour wall-versus-room check
Place one hygrometer in representative room air and a second in the reopened furniture gap without touching the wall or fabric. At morning and evening, record both temperature and RH, the coldest accessible wall-surface temperature, outdoor conditions, rain, and heating or cooling operation. Use the same locations each time.
For example, air at 70°F and 50% RH has a dew point of about 50.5°F. A wall surface at 48°F is below that dew point and can collect moisture. At the same 70°F but 40% RH, the dew point is about 44.6°F, creating more margin. Use the dew-point calculator with your readings rather than treating either example as a universal target.
- Compare the patch with an interior wall at the same height.
- Note whether the gap reading changes after the furniture is pulled forward.
- Repeat through a cold night or rain event if that is when the problem appears.
Separate room-side condensation from water inside the wall
A broad, cool patch that aligns with blocked airflow and improves after the gap is opened supports a room-side condensation mechanism. EPA guidance specifically identifies cold corners behind furniture as a frequent mold location where condensation forms.
A leak becomes more likely when the stain expands after rain or plumbing use, has a clear upper starting point, produces soft or swollen material, or remains wet while the room dew point is safely below the measured surface temperature. A dry surface reading cannot rule out moisture deeper in a wall; persistent evidence deserves a qualified building-envelope, roofing, or plumbing assessment.
Correct the mechanism without hiding it
For a cold-surface pocket, leave enough clearance for room air to circulate while preserving required furniture anchoring, reduce indoor moisture sources, and avoid blocking supply or return paths. Repeated cold stripes or corners can justify an insulation and air-sealing assessment; the correct detail depends on climate and wall construction.
For bulk water, repair the exterior, plumbing, or mechanical source and verify drying before closing, insulating, caulking, or refinishing the area. A dehumidifier can support drying but does not repair water entry, and new paint can conceal evidence without solving it.
Clean only after the source is controlled
EPA says that in most cases a homeowner can handle an affected area smaller than about 10 square feet, while larger areas, extensive water damage, contaminated water, HVAC involvement, or health concerns call for additional guidance or professional help. Follow EPA protective-equipment and material-specific cleanup advice.
Hard surfaces may be cleaned with detergent and water and dried completely. Moldy porous materials such as wallboard, carpet backing, or upholstered components can be difficult or impossible to clean fully and may need replacement. Do not routinely use bleach as a substitute for removal, drying, and source correction, and do not paint over moldy or damp material.
A measured action plan
- 1Photograph the wall, furniture back, floor, and baseboard before disturbing the pattern.
- 2Mark comparison points and record room air, gap air, wall temperature, weather, and HVAC state for 48 hours.
- 3Use the dew-point calculator to test whether the wall was cold enough for room-side condensation.
- 4Match the timing to cold weather, rain, plumbing use, or HVAC operation and send the evidence to the appropriate trade if a leak or assembly defect is likely.
- 5Correct the moisture source and confirm the area is dry before cleanup, replacement, or repainting.
Useful tools to compare
These product categories match the checks in this guide. Compare specifications and current instructions; they are not hands-on test recommendations.
Track RH away from vents and wet surfaces.
View current options on Amazon ↗02Infrared thermometersLocate cold surfaces while accounting for reflective-material errors.
View current options on Amazon ↗03Building moisture metersUse repeatable comparisons; readings are material-dependent.
View current options on Amazon ↗Sources & further reading
- U.S. EPA — Mold Course: Why and Where Mold Grows ↗
- U.S. EPA — Moisture Control Guidance for Building Design, Construction and Maintenance ↗
- U.S. EPA — Mold Cleanup in Your Home ↗
Reviewed against the linked sources in September 2026. Product instructions and local codes take priority for a specific installation.